Showing posts with label book design. Show all posts

Tuesday, March 4, 2014

Book Formatting Made Easy

Happy Tuesday, good people of the blogosphere! Today, I'm talking about book formatting. You know, that niggling little thing we all have to do before we can put our books up for sale to the masses. First, you have to format it for print! Then, you have to format it for digital. If you're on more than one platform, you have to format your digital version more than once. Sounds fun, huh?

No?

Well, allow me to introduce you to something that will save you a ton of formatting time. While you won't get the level of interior design you can achieve with a professional designer at your side (bleed, images that relate to your story, etc...), you can still have a professional looking book with less work on your end. If you're on a budget (as all Indies I know are), this is the answer to your fervent prayers.

I suggest using the service I'm about to tell you all about in The Indie Author's Guide to: Building a Great Book. That publication goes into where you can sell your book, how to format for each platform, and gives a ton of references you can use to make your book the best publication it can be.

BUT!

Come on, you knew that was coming. *grin*

If you've read TIAG, you'll know my referral was for the print version of your book only. Now, you can get templates for both the print and digital versions of your book.

It's genius (and I've said as much to the brains behind the project).

I know you're chomping at the bit to find out where you can get these templates. Well, here's your link:

Book Design Templates

Their templates include:
  • 2 Way (these are the ones that work for digital and print) for Fiction, Memoirs, and Narrative Non-Fiction
  • Fiction, Memoirs, and Narrative Non-Fiction (print only)
  • Non-Fiction, Reference, and Technical (print only)
  • Children's Books (yes, really! print only)
  • Specialty - Book Proposals and even a template for a mini version of your book!

Who are the masterminds behind this awesome breakthrough? Joel Friedlander and Tracy Atkins from The Book Designer blog. If you've never heard of that blog, I invite you to jump on over and poke around. You'll find a lot of great stuff over there about self-publishing and book design.

What are you waiting for? Get going!

I'm in no way compensated for any links I provide on my blog (except those that go to my own books, and that's only if you buy one!). So you can always be sure the recommendations you get here are 100% for you.

What do you think of this awesome breakthrough? Will you use it?

Well, that's all for today, folks! Until next time, WRITE ON!

Jo

Friday, December 6, 2013

Notes on Createspace File Prep, and NaNoWriMo News

Happy Friday, everyone! Wow, this week flew by! I'm knee-deep in the launch prep for I, Zombie and have had so much fun shouting about it everywhere. We'll see how it goes. On to other, more production type things! Today, I'm talking about something to beware of when printing your book with Createspace. Let me start off by saying I love Createspace. I think they're the best, easiest option out there for Indie authors to get print books. However, the issue I'm detailing today really needs to be something they fix somehow. Perhaps a special account for those that know what they're doing.

So, I decided to release an anthology of the first 5 Mystic books in print and use the covers that will be changed globally when Markaza's book is released next year. Because of this, I also revamped the interior. Well, this caused me a huge problem. Let me show you what I mean; telling you isn't going to help.

I love typography. I think it makes some of the most beautiful art on the planet. Apparently, CS doesn't agree with this practice. When I uploaded my book with this pretty type-style artwork on the chapter openings pages:


(I adore it. What you see here is the page trimmed to the bleed lines. Now keep in mind, the M would disappear into the gutter quite a bit and it's cutting off the C and the dot on the I. Still, pretty, eh? And matches the cover perfectly!)

They rejected it.

Why? The reason they gave me is that the text is too close to the edge of the page which would result in quite a bit of it being cut off during production. There should be at least a .125" margin on all sides.

I e-mailed them and outlined that the text they were referring to wasn't meant to be read, it was there for artistic purposes, was a 330dpi image (this is why their auto-checker didn't find any issues), and there was a ONE inch margin around the text in the body of the book (more than they require, but an industry standard). Hell yeah, I was gonna fight for my design!

I waited less than 24 hours when a response showed up in my inbox. A human would try and explain my design to the other humans who look over the book and get the approval for the proof regardless. That person would try and push my design through to production and I should look for an answer sometime over the next two days. YAY!

Excitement flooded me! I was gonna get my beautiful type treatment!

My joy was short lived, however, when I was told there was no way the team could push it through.

Drats!

At that point, I'd exhausted all my options and decided to just reformat the chapter opening pages without my beautiful type art.

This is what I ended up with:

While still fun, and very Markaza-ish, it's just not what I would've preferred.

Oh well.

Why am I sharing this with you? To keep you from using type in a full bleed page design intended for Createspace and having them reject it. Twice. As always, I'm trying to save you from a permanent red spot on your forehead from banging it on the desk out of frustration.

Lesson learned. I feel like the bad child who had their hand slapped. *Note to self: Never EVER use type that might be cut off in ANY way in your book design until you've convinced CS to create a special account just for you*

Yeah, that's my next goal. I'm gonna try to get them to change the policy where this is concerned. *grin*

I'll keep you updated.

On to the next part of this post!

If you were a participant in NaNoWriMo this year, you're now able to go pick up your winner goodies! There's some awesome stuff on the offering block so I suggest you go check it out.

NaNoWriMo.org

Look very closely at the Lulu offer. That's all I'm going to say about it.

Have you ever experienced this kind of thing with your printer? How did you handle it?

Well, that's all for today, folks! Until next time, WRITE ON!

Jo

Tuesday, September 10, 2013

Setting Up a File for Your Book Cover Design

Happy Tuesday, good people of the blogosphere! Today, we're talking about setting up your file in Adobe Photoshop CS5 so you can design an awesome book cover that will translate well to print and not cut off anything important. Now, the instructions here can translate to ANY design program you're using. The measurements are the same. I have PS, so that's what I'm walking you through. You can also get this information in my book, The Indie Author's Guide to: Building a Great Book. That link will take you to the Kindle version (just $2.99). My guide takes you through more than cover setup though! It goes through how to format everything so your book comes out the other side looking amazing in both digital and print formats.

Enough about that. Let's get going! I have fun screenshots for each step, so you won't get lost.

First, open Photoshop (or your program of choice):
As you can see, I've tailored it to my specific preferences. So, your screen may look a wee bit different.
Now, click on file>new:
Set the document up as follows, replacing the words "My Book" with the title of your book. I'm showing you here how to set up a cover for a 5.5"x8.5" book. If designing a different size, add 1/4" (.25") to the height and width.
Notice I changed pixels to inches, the resolution to 330, and the color space to CMYK. Wait! Why did I change it to CMYK? Because printers don't print in RGB. CreateSpace uses a four color process printer and it'll do funky things to your cover colors if you design in RGB. CMYK changes to RGB (web colors) easily but not the other way around. Here's a little example of the difference:

See how the CMYK colors are a little bit duller? You do NOT want that to happen with your book cover. Okay, moving on...

You should now have something that looks like this:

Next, drag guides to cut off 1/8" (.125") all the way around the book cover. Like so:
I filled the background with white so you can see the guides. Outside the guides is your bleed area (the area that WILL be cut off when the printer prints your book). Now, not all cutting machines are super accurate (the shame!) so you'll need to identify a safety area as well. This is the place you don't want text or anything you want to keep on the cover. If you stay inside these lines, you're guaranteed to be okay. Drag guides to mark your bleed area at 1/4" (.25") inside the bleed line. Some places only make you carry a safety of 1/8" (.125"), but it's better to be safe than sorry. Your document should look like this:
Now I'll show you in colors what you're looking at:
Bleed is the area that WILL be removed. Safety is the area that MAY be removed. Live is the area where your book cover design should be. Nothing should move outside the LIVE area.

As you can see by the ruler on the edge of the screen, when cut at the bleed line, your final product is 5.5"x8.5":
If you take the time to design your cover this way, all you'll have to do when you're ready to set up your cover document with CreateSpace is flatten the image, drag it into the new wrap, and drop it. Once you're all designed and ready to go for digital, save it as a PSD (in case you want to change something later), then flatten it, change the color space to RGB, and save it as a .jpeg. I guarantee it'll be the correct aspect ratio for all platforms.

I hope this saves you all from wearing huge red spots around on your foreheads.

Did you know all of this? Has it helped you in some small way?

Well, that's all for today, folks! Until next time, WRITE ON!

Jo

Wednesday, August 14, 2013

Beautiful Books in Print

Happy Wednesday, everyone! What a lovely day it is. So, I was poking around my e-mail and came across a post that went up on The Book Designer. It's all about layout and page margins. If you have more than a moment, go check it out. Totally worth your time. So, today I'm gonna talk about another aspect of print book formatting: beautification. So, grab those pens and notebooks and let's get going!

Joel makes some excellent points in his post about a book designer needing to be detail-oriented. We pay attention to the things you may miss or may think aren't important. What I think needs to be added to that post is something about the designer beautifying the book beyond the typography (which is the number one consideration). If your designer doesn't know typography, your book won't look (or read) like it should. But, that's another post. For now, let's talk consistency and artistic elements that will make your book stand out from the crowd.

Consistency:
When I'm formatting a book, elements and typefaces from the cover can be found within the pages. Sometimes, I'll set the books text in one of the fonts used for the cover, but this is rare (display or title faces do not good reading make). Rather than use a font that doesn't flow well, I tend to use the display or title fonts for the details. Running headers (or footers) can be set in any typeface you'd like because they aren't put there to help you read. Page numbers can be adorned in many ways because they serve only to mark a place or add a bit of glamor to a page.

My favorite place to use the cover fonts is in the chapter titles and numbers. And, man, are there a ton of ways you can format that first page! It's the page where the text generally begins about halfway down and you have all that white space to play with. You can add flourishes, decorative type, images, logos, anything! Drop caps are fun, too! But any good designer is going to take the time to make sure it's consistent.

You don't want a flourish on chapter one and then not again until chapter thirty. You don't want story breaks to have boring white space between them. Above all else, you don't want someone to open the book and be shocked by how different the inside is from the outside. They should be wowed.

Beautification:
If I've read the book, my imagination goes a little wild when I'm adding those little details that make a book sing off the page. I sometimes use elements from the cover or story throughout the design.

Here are a few of my interior designs (I'm including the covers so you can see how they match):


(There's a chance to win a printed copy of that last book shown, Borrowed Things, running right here on this blog! Check it out!)

Those are the types of things I love to do when formatting books. That logo on Borrowed Things is repeated for every story break (smaller in size, of course).

A couple of books I was wowed by when I opened them:
Splintered by A. G. Howard
Reckless by Cornelia Funke
Fearless by Cornelia Funke

These are the book designs that stay with me. Sure, I remember stories from many books, but it's when I'm wowed by a design that I remember the story with vivid detail. Each of those links provides a look inside option. Go look inside! See what these people are doing. Love it. Learn from it. Your only restraints are your imagination!

I hope you all got a new perspective on book beautification and consistency in design today. I also hope you checked out Joel's blog and took his advice to heart. Remember, don't sacrifice readability for lower printing costs! Margins matter!

If you're interested in having a book formatted for print, contact me using this form.

Well, that's all for today, folks! Until next time, WRITE ON!

Jo

Friday, June 28, 2013

CreateSpace - Head to Desk

Happy Friday, good people of the blogosphere! Yay! Friday! It's about time, too. This week was a long one, but I wrote many words. I have five works in progress, so expect a rash of publishing coming out of this Indie author later in the year. Perhaps I'll be doing a number of giveaways around Christmas again. My goals are to publish the next two installments of the Mystic series (Melody and Coralie), M, Player, and possibly another book I've written a chapter of. Lofty goals! But that's not the topic of today's post. Today, I'd like to talk about CreateSpace.

As you may know, I'm a graphic designer. Because of this, I use Adobe InDesign to format my books for print. On occasion, I format books with artwork that bleeds off the edge of the pages. As in the examples below:

 The Bird
 Dark Premonitions - Second Sight, Book Three
Chasing Memories - The Tala Prophecies, Book One


If you've read The Indie Author's Guide to: Building a Great Book, you've probably already hit the point where you don't get errors back from CreateSpace's auto-check. And you're probably using MS Word to format your books.

This little golden nugget of teachings is for those of you that want to have elements in your book that bleed and are using ID.

When you place your artwork, be sure the bounding box bleeds on all sides all the way to the edge. Even though it looks right on the screen, and you know it'll print correctly, the auto-check will kick it back and show it as an error. If you ignore the issues and save past them, submitting your book without the all-clear, you'll get a reject.

I've even gone as far as to call CreateSpace about the book I'd submitted, assuring them that the artwork was exactly as I wanted it, and they told me they couldn't push it through to the printing house without causing a major headache for everyone involved.

So, to keep others from experiencing mounds of frustration, and having minions, who only know that if the auto-check says no it can't happen, laugh in your face and tell you there's nothing they can do, I'm sharing my frustration.

I only thank the heavens above that I experienced the drawback with my own book and not that of a client. I'm grateful for the experience, but wish I'd known all that I'm sharing with you now before I hit that wall and was forced to step back and re-group.

I hope this post prevents some headaches for some of you.

If you're designing in MS Word, I'm not sure you can create elements that bleed. Though perhaps it's possible.

Well, that's all for today, folks! Until next time, WRITE ON!

Jo

Friday, April 19, 2013

Templates for Using MS Word to Format for Print

Happy Friday, good people of the blogosphere! Today, I'm going to share some news and give you a coupon! How awesome are coupons? If you're an Indie author and you've been struggling to make your book look more professional through self-publishing platforms like CreateSpace, you're in for a treat.

Not long ago, I did a post about MS Word vs Adobe InDesign. I went through a few of the good and bad things for using each. Now, you have some additional options for making your book look awesome with MS Word. I know I'm not far off when I say, many of us just can't afford programs like Adobe InDesign and most of us wouldn't know how to use it even if we could. With InDesign, you can create books that look like this:


Now, I'm not saying you'll ever be able to do that with MS Word. I just don't know if it's possible. What I am saying is that you can have an awesome printed book for little to no cost. Keep reading.

I'm a regular subscriber to The Book Designer blog. His name is Joel Friedlander and he does a lot for those of us in the self-publishing world. If you don't already subscribe, I suggest you do so ASAP. It's a wonderful resource for Indie authors. Okay, moving on.

What's the big news? I'm getting to that!

Joel has partnered up with Tracy Atkins, author of Aeternum Ray and partner over at Dyslexiana, to bring you MS Word templates you can use to make your book look awesome in print. Yeah, I know, it was a little difficult for me to believe as well; but take a look at this post where Joel announces the launch. Those look pretty awesome, huh?

If you hop on over to their website BookDesignTemplates.com, you'll even get to download a free copy of their Book Design Templates Roadmap. It walks you through how to use the templates you buy. If you want to skip all the hubbub, you can go right on in and look at some of the templates available by clicking here.

Prices start at $37 each. But, after you buy one, you can use it time and again.

What's all this about a coupon?

Well, Joel is offering a coupon code for 41% off any template you buy. Holy moly, right? That makes each template's price start at just $15.17!! You can read all about it in his post here.

Without further ado, I give you the code: book41

You can follow Joel on Twitter, too. He's @JFBookman

Happy shopping!

Well, that's all for today, folks! Until next time, WRITE ON!

Jo

Wednesday, February 13, 2013

MS Word vs Adobe InDesign

Happy Wednesday, good people of the blogosphere! Wednesday is called "hump day"... no, get your mind out of the gutter...! because it's the middle of the week and, if you make it through today, there are only two days until the weekend. Here's wishing you well on your Wednesday! I've heard a ton of talk lately about how MS Word is comparable to InDesign for laying out print books. Well, it's not. While it's great for laying out and formatting digital books, nothing compares to the power of Adobe InDesign for laying out a print book.

Grab your pencils and notebooks because you're gonna want to take notes today!

MS Word is a powerful machine for writing. It's great for term papers or formatting a book for upload to the various digital sellers on the web. It spell checks, indents according to your settings, and is easy to place images in. It also converts to html or rtf rather easily by simply choosing save as and making your selection. But there's one thing MS Word doesn't have that leaves it the squalling, hungry infant when compared to Adobe InDesign: Master Pages.

Master Pages are the end-all be-all of the print world. With a master page, you can tell InDesign what every page of your book should look like and where those individual pages should appear. You can pop in a page number and it will appear in the same place on every single page of your book. Adding artwork is easy; you simply place it on the master page and, voila!, it's on every page you have that master on.

I'm going to use The Bird as an example here because I used two sets of master pages to design it: A and B. Master page A was the common page where text, running headers, and page numbers would appear. B was the opening chapter pages. Time for some screen shots!
This is Adobe InDesign CS5. If you click on the image, you'll see I've identified the marks around the page. This is the opening of chapter two in The Bird.

This is Master Page A. It's the common page and you can see it has running headers, a text box, some nice flourishes at the bottom, and page numbers. It will automatically number each page according to where it falls in the book.
This is Master Page B. It's the chapter openings page. There's a left-hand and a right-hand, just like Master Page A. When I have a place where a chapter starts, I click the corresponding page, drag it, and drop it on the page it should appear on. Like magic, it's all there.


This tells me I'm looking at Master Page A. It's the tiny box in the top right-hand corner of the screen shots above.


When I'm done, I export it to a PDF and upload it to CreateSpace. Master Pages are the bomb. Period. MS Word can't touch this feature. Even with predefined formatting specs.

All the elements of a master page are locked so you don't accidentally move them around. But there's even a way around this! You ctrl+shift+click on any element and it will become editable. How damned cool is that?

In addition, if I wanted to use this exact layout on every book I produce, I can save it as a template that will re-load with all master pages intact. Comes in handy when formatting a series and you want each book to be identical on the inside!

I hope you learned a little bit today and, if you layout your own print books, are now considering an investment. No, I get no kickbacks from Adobe. I don't do that on this blog. I recommend tools I know you'll love if you give them half a chance.

Well, that's all for today, folks! Until next time, WRITE ON!

Jo

Monday, February 11, 2013

Inches Picas and Points

Happy Monday, good people of the blogosphere! How are you all today? I hope the start of this week brings you many smiles! Today, I'm gonna try and explain how inches, picas, and points are used in design. So, grab those pens and notebooks and let's get going!

An inch is a common measurement used in the U.S. Picas and points are international, universal, measurements used in design work. These two units are used to measure type and layout sizes. That way, a designer in the U.S. can do work for someone in the U.K. or Japan and the measurements are the same without having to do a ton of conversions.

If you've ever looked at the size on your type, you'll notice it's referred to as: 12pt, 14pt, etc... A 12pt type size is also a one pica type size. Click on the image below for reference as we move along.
Allow me to break it down:
1inch = 6 picas
1 pica = 12 points

So when you see a measurement like 1.5" it equals 9p0. That's 9 picas and 0 points. We got there by taking 6 picas (one inch) and adding it to 3 picas (half an inch).

But wait! Adobe products do the conversions FOR you! If you have 12cm, you type in 12cm and hit tab and pow! you have your conversion (28p4.157). If you have 1.285 inches, you type in 1.285" and hit tab and pow! you have your conversion (7p8.52). How awesome is that?

So the next time you're designing that all important book cover, pay attention to the type size. Remember, your leading (the space between your lines of type) should be at least 1.5 of your type size. In other words, an 11 point typeface would get leading of around 16 or 17 points but a 9 point typeface would get 13 or 14. Your decision (I like 11 on 17 and 9 on 14). See image above for examples.

Well, that's all for today, folks! Until next time, WRITE ON!

Jo

Thursday, February 7, 2013

What's a Display?

Happy Thursday, good people of the blogosphere! Today we'll talk about display fonts and answer some questions like: When to use a display font? How to identify a display font? Examples of display fonts. So grab your pens and notebooks and let's get going!

Display is defined as: Making a prominent exhibition of a thing where it can be noticed. Example of a display font:
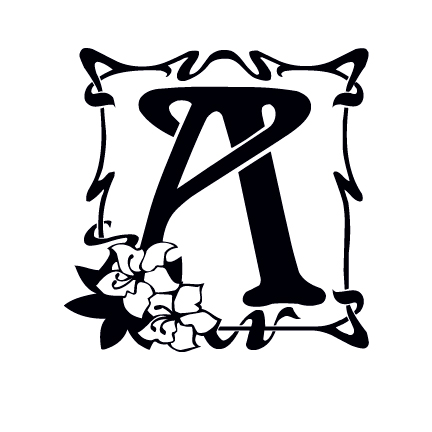
This letterform is from the font family known as Capitular Floral. Pretty, huh?

When should you use a display font?
Much like a script font, a display font is for just that - display. They're not meant to be used in blocks of text but they make nice drop caps and decorative elements used at the start of a chapter. So stick to using them as decoration rather than text.

How to identify a display font?
If your letters do weird things when you're trying to type them out, it's probably a display font. They're usually very decorative and hard to read when combined in sets of more than one or two. Not all of them have a box around them or have really gritty details like the one above.

Some examples:
As you can see, they don't read very well when combined. Never ever use them for book design unless you're adding a single decorative letter to the beginning of something.

This concludes my font week. I hope you all learned a little bit and had some fun along the way!

What's your favorite display font?

Well, that's all for today, folks! Until next time, WRITE ON!

Jo

What is a Script?

Happy Wednesday, good people of the blogosphere! Today we'll talk about script fonts. Some questions I'll answer are: When to use them? How long have they been around? How do I identify a script typeface? So grab your pens and notebooks and let's get going!

A script typeface is defined as: Handwriting as distinct from print. An example:
This letter is from the font family known as Edwardian Script. It's been around since 1994. A relatively new font in comparison, eh?

When should you use a script font?
When you want something to look like it was hand written. I've seen them used in titles but rarely more than one or two words. They're commonly used as a drop-cap at the opening of a chapter to give it some flair.

How long have they been around?
For as long as we've been writing things by hand with quill and ink! Everyone has a script font in them waiting to escape.

How do I identify a script font?
If it looks like a normal person's handwriting or calligraphy, it's a script. Easy peasy.

Some popular script fonts are:

Some of these I had to make bigger so you could read them at a glance. They're hard to read when used in a large block of text. Don't use script fonts when formatting your book for print unless they're used as a decorative element.

What's your favorite script font?

Well, that's all for today, folks! Until next time, WRITE ON!

Jo

Tuesday, February 5, 2013

What about Sans Serif?

Happy Tuesday, good people of the blogosphere! Today, we're talking more fonts! I know, I know, crazy stuff. But the topic for today is sans serif fonts. Why do we use them? Where did they come from? What are some common ones? So grab your pens and notebooks and let's get going!

A sans serif font is defined as: A style of type without serifs.

The type you're reading now is sans serif. It's called Arial. Designers worldwide just drew in a collective gasp. Yes, I know Arial is the knockoff Helvetica. Sorry, I like it. So, for a larger example:
This letter is from a typeface called HelveNuThin. It's the one I use for my name on the cover of my novels. Notice there are no protrusions of any kind on the letterform. This is an excellent example of a sans serif font.

Why do we use them?
They're easier to write and have become more widely used with the invention of the computer. Now, here's a tidbit of trivia for you! Arial was designed by Microsoft when the designer of Helvetica wanted a payment for every copy of windows that was distributed. They hired someone to come up with a font similar so they wouldn't have to pay. Hell hath no fury like the design world when one uses Arial. By the way, that stop sign near your house? Helvetica is the font used. Anyway, I digress!

Where did they come from?
The first sans serif typeface was Caslon in 1745 but they didn't become as popular as they are today until the invention of the computer.

What are some common ones?
And I hope this answers questions you may have had about serif typefaces. Tomorrow, we'll talk script typefaces and I'll give some examples of those, too!! For printed book design, Caslon is a popular choice.

What's your favorite sans serif font?

Well, that's all for today, folks! Until next time, WRITE ON!

Jo

Friday, February 1, 2013

What is a Serif?

Happy Monday, good people of the blogosphere! This week we're going to learn about letterforms. Today's topic is serifs. What are they? Why do we use them? What typefaces are considered serifs? So grab your pens and notebooks and let's get going!

A serif is defined as: A slight projection finishing off a stroke of a letter.

This text is not a serifed typeface. An example:
This letter is from the type family Georgia. Those little feet on the A are called serifs. Any letterforms with protrusions like those are considered to be a serifed typeface. Sometimes, they can resemble cups or be prettier than the ones here, but they're all still serifs!

Why do we use them?
It goes back to ancient handwriting. Even the first typewriters used a serifed (slab serif) font. Basically, readability is why we use them. There are slab serif fonts, too. Those more closely mimic what was done with a chisel and hammer back when we were banging around on rocks and was what many typewriters used. An example:
This letter is from the type family Rockwell. It's called a slab serif because the serifs are the same basic weight as the strokes on the letter.

A few other serifed fonts are:

Just to give you an idea. Now you can start noticing some of your own. For printed books, Palatino is a common font to use. Always consider legibility FIRST when producing a book. After all, we want them read, right?

What's your favorite serifed font?

Well, that's all for today, folks! Until next time, WRITE ON!

Jo

Friday, January 25, 2013

Hiring a Book or Cover Designer

Happy Friday! It's time for the weekend! I can hear you cheering. Today, I'm going to give you some tips on what to look for when hiring a designer for your manuscript and cover. I'll give you a list of questions you should ask, what you can expect from your designer, and what you should prepare in advance. So grab those pens and notebooks and let's get going!

First and foremost, you should prepare a creative brief. Your brief should include:
  • Your name and pen name
  • Your address and billing information
  • The book's title
  • Genre
  • Blurb
  • Any review matter you'd like included
  • Cover copy (the text that appears on the back or inside flap)
  • Your vision for your book
  • Other books in your genre (for reference)
  • Headshots, logos, or any other imagery that must be included (like awards the book has won)
Now that you have your brief, you should approach a designer. Before handing over your brief, you need to ask some questions to make sure you're hiring someone that knows their stuff. Ask things like:
  • Have you ever formatted for XYZ company's specs before?
  • Do you have a design degree? (While this isn't necessary, it doesn't hurt to know going in.)
  • What software do you use for design?
  • Can I see some of the other work you've done?
  • Explain bleed to me. Bleed is the area of the image that hangs over the edge and is cut away during production.
  • What is kerning? Kerning is adjusting the space between letters.
  • What is tracking? Tracking is adjusting the space between a whole line of letters.
  • What's the standard safety margin for live elements? Standard safety is .25" from the edge for books. Some production houses call for .125". Either answer is correct. However, CreateSpace wants .25".

If your designer nails all these questions, you've got someone that most likely knows their stuff.

What you can expect from your designer:
A good designer will give you three very different choices to start with. They'll ask you to narrow it down to one and give you up to two revisions on that one design. Once you decide on a cover, the interior should compliment fonts used and look and feel of the book. Again, I'll use The Bird as an example:

Note the font on the cover of the book and the design elements around the border.
Now note the font on the chapter heading and number and the design elements around the edges of the page.


Watch out for the designers that mix two script fonts, two serif fonts, or two sans serif fonts in their design. This is a basic Typography no-no because it always comes off looking like a mistake.

Your designer should provide you with all files:
  • Thumbnails
  • Cover sized and formatted for digital uploads
  • Cover sized and formatted for display on a website
  • Entire cover for production house, formatted properly and in proper color space (CMYK ONLY)
  • Cover in black & white
  • List of fonts used

They won't give you the original files they built. Don't ask. This is like you writing a story and someone else wanting to tinker with it and release it with your name on it without you approving the changes.

Your contract should include:
  • Statements saying the artwork is yours once the work is done and that you're free to use it in any way you see fit at no extra compensation for the designer or any third party.
  • Deadlines and penalties for not meeting them.
  • A guarantee clause stating all work is original and designed by them.
  • A clause stating all artwork contained in the design is free from copyright by third-party entities.
  • Number of revisions allowed at no extra charge.
  • Payment arrangements in detail.
  • Your name, their name, and all addresses associated with you both.
  • Number of files you'll receive and sizes/specs.

This is protection for both you and your designer. They should never ever balk at signing a contract.

I hope this helps many indie authors get the quality and professionalism they deserve in a designer. Over on Joel Friedlander's blog today, there's an interesting post about judging a book by it's cover. I beg you to go give it a read.

Any questions? Leave a comment and I'll get back with you ASAP.

Don't forget to enter the giveaway while you're here!
a Rafflecopter giveaway
Well, that's all for today, folks! Until next time, WRITE ON!

Jo

Thursday, January 24, 2013

Formatting Your Manuscript for Print

Happy Thursday, good people of the blogosphere! Since it's so close to Friday and Valentine's Day, I thought I'd give you all a little something to look forward to! Let's first discuss that all important thing I like to call formatting a print book then we'll get into the awesome rafflecopter prizes I have up for the winning. So, grab your pens and notebooks and let's get going!

When you format your manuscript for print, there are a lot of things you need to take into account. Just slapping some text into your book works, but it won't wow your readers and make them want to pick up your book for keeping.

In my book, The Indie Author's Guide to: Building a Great Book, I go into how to format your manuscript in MS Word. Why? Because it's a standard item on most computers. I give you the bare bones on how you can produce a legible document for print. Best of all, I made it just $2.99 on Amazon and Smashwords. But what about getting creative?

If I went into designing a book for print in InDesign, many of you would be scratching your heads. I tried to keep it simple and easy to understand. But there's a lot to be said for either hiring someone who knows InDesign to format your book or buying the program and learning how to do it yourself.

Here are a couple of examples of things that can be done using a program like InDesign to format:

 Chapter 1 Page 1 of The Bird
Chapter 1 Page 6 & 7 of Yassa


I've applied stylized formatting to the Copyright page and the front matter as well. The interior of The Bird is full bleed so the page you see there will be trimmed .125" all the way around. It'll be beautiful and give my book that little something extra.

A good book designer will know odd pages are always on the right, even pages are always on the left, and front matter gets no numbers (unless roman numerals are used - often for a forward or introduction). Ask these questions of your designer before you hire them!

I talk about all these things and SO much more in my book. I designed the print edition small so you can carry it with you or keep it on your desk and it not take up a ton of space. My first printed edition of Yassa is in a larger typeface for those who would like to read without their glasses. I've gotten a ton of thanks for that. In the Mystic series, every book looks the same. The interior is simple because the subject matter is serious. Above all else, it's consistent.

This all leads me to my point: Think long and hard about your print books. If necessary, talk to a graphic designer or reader and ask them what the most alluring covers and interiors entail. Take copious notes and implement them when designing your book.

Now, on to the giveaway! In keeping with the ideas presented in The Indie Author's Guide, I'm giving one lucky winner either a digital identity package OR a book cover design OR a book formatted for print. Another lucky winner will get an advance printed, signed copy of The Bird, a huge Mystic~Bronya cover poster, three postcards featuring Mystic and Yassa, and a Mystic bookmark.

Without further ado, here's the entry form:
a Rafflecopter giveaway
GOOD LUCK!

Well, that's all for today, folks! Until next time, WRITE ON!

Jo